Internationalization
The project has integrated Vue i18n, and Chinese and English language packs have been configured.
IDE Plugin
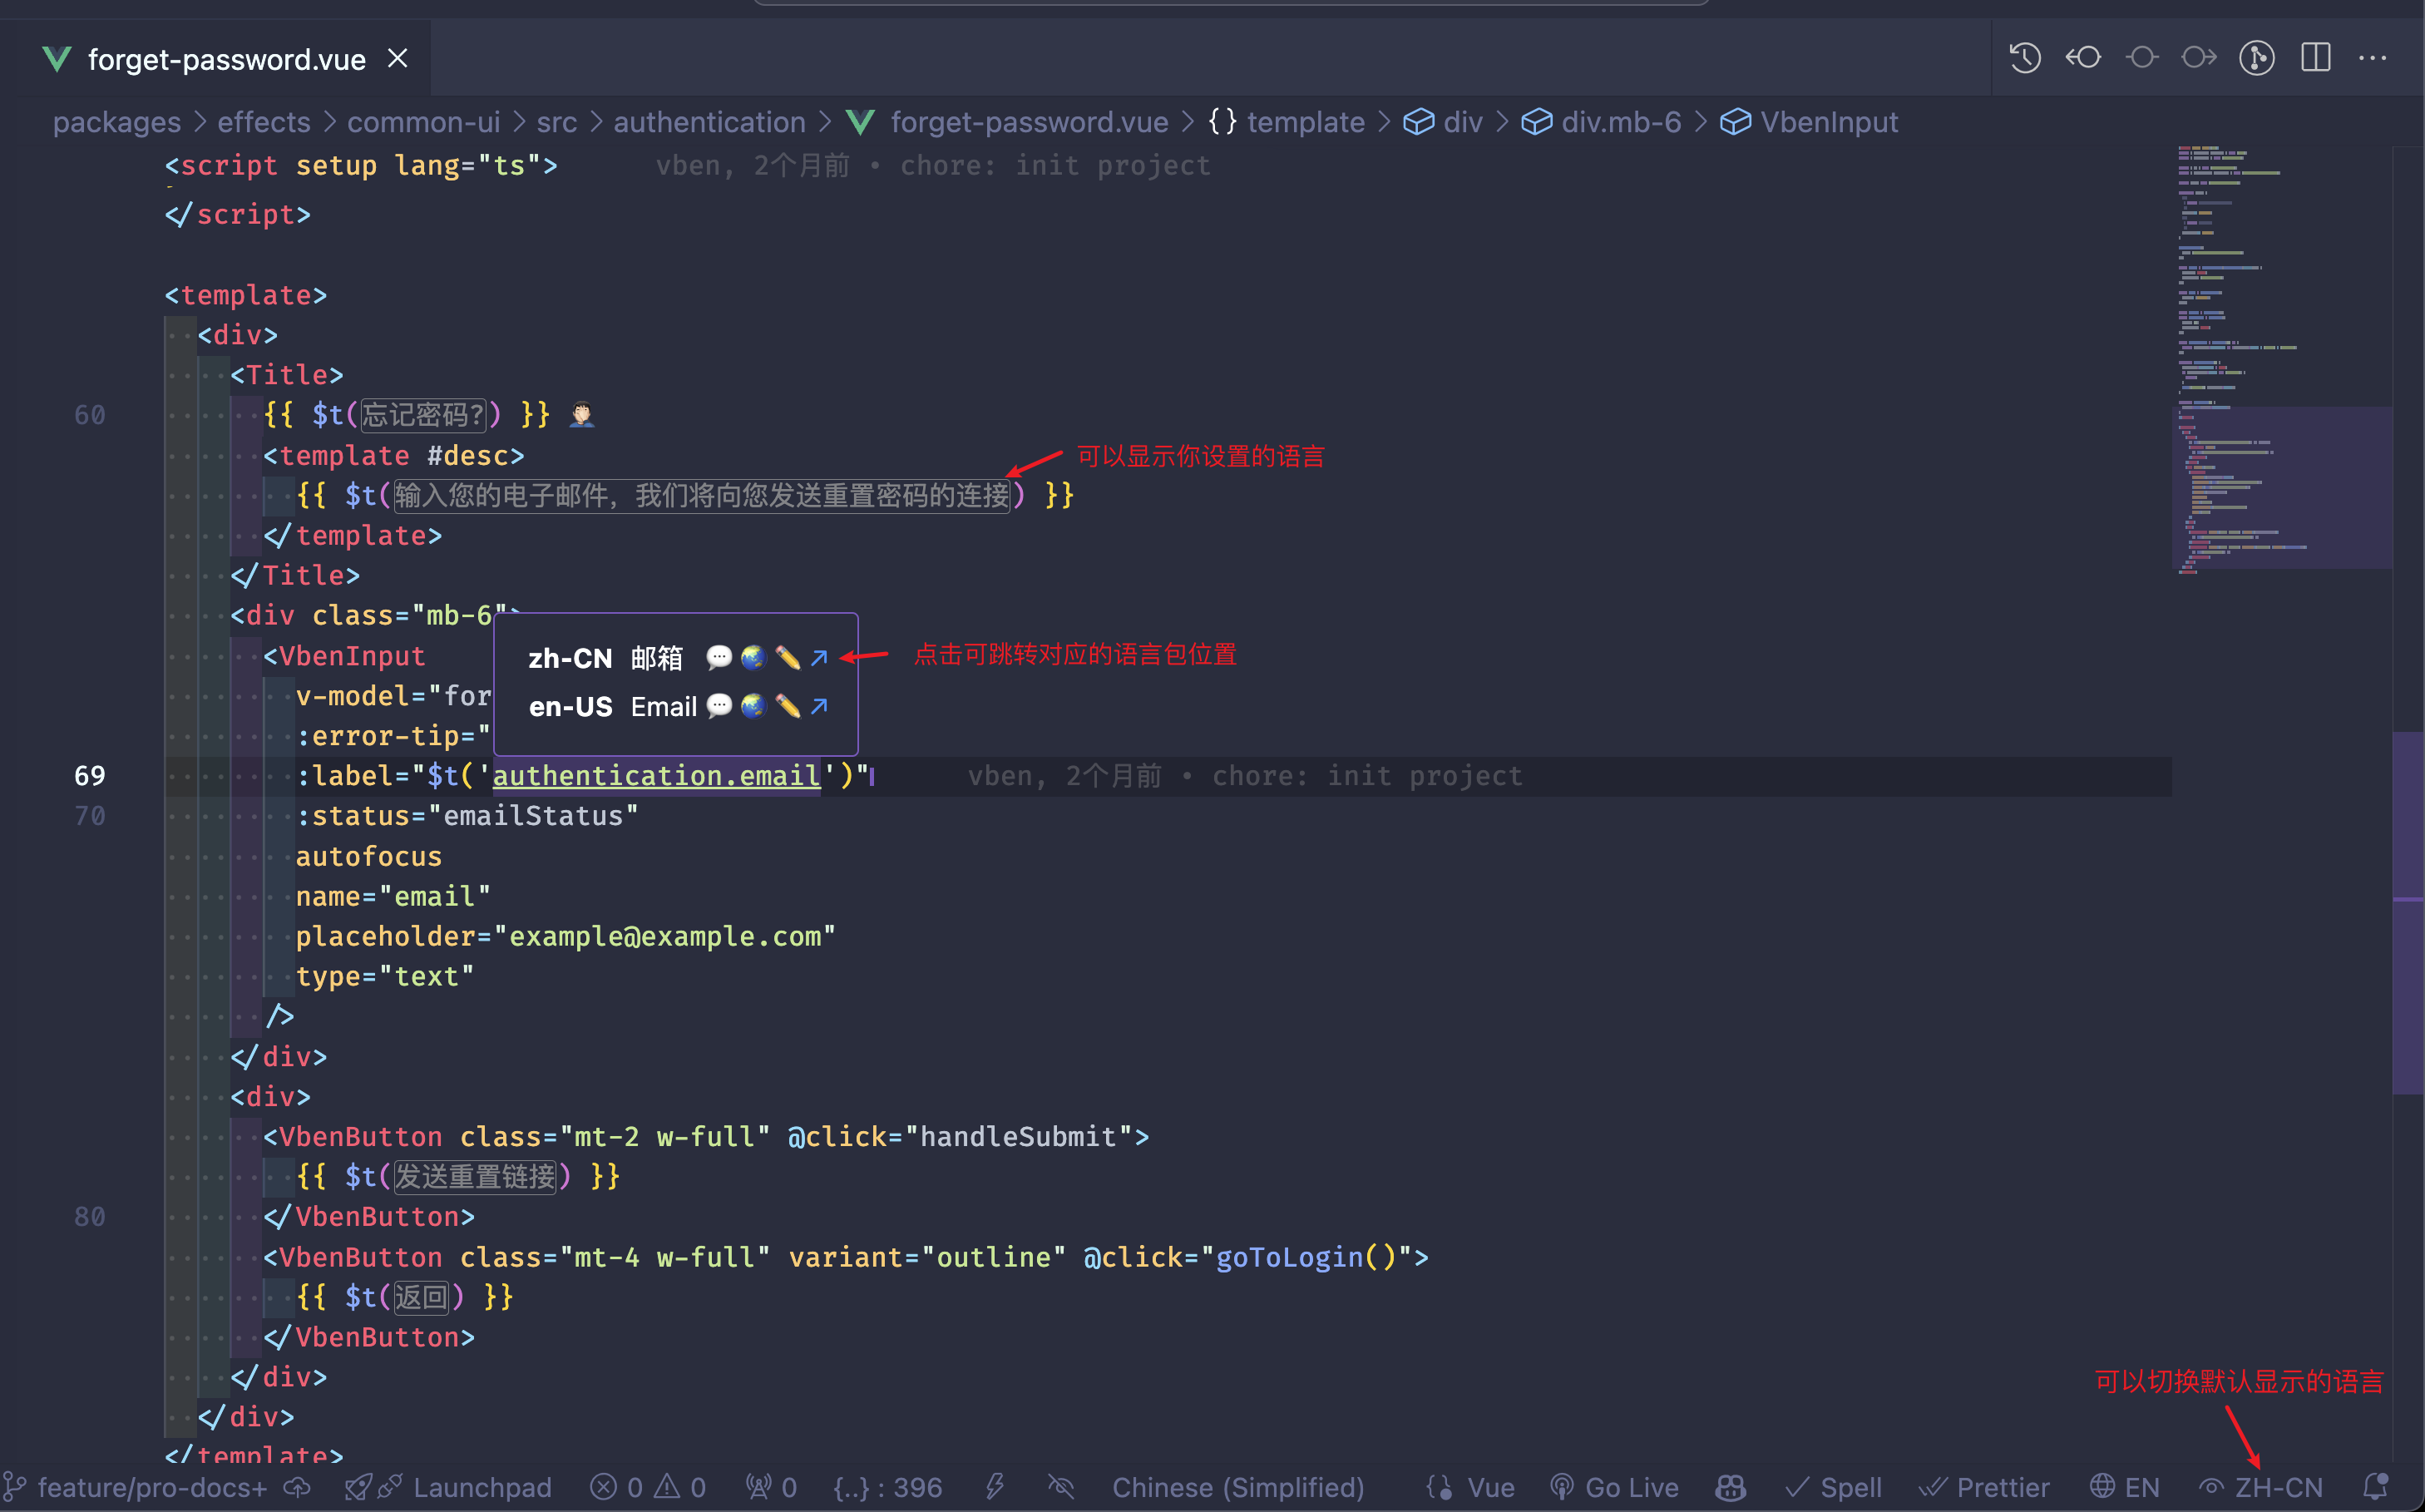
If you are using vscode as your development tool, it is recommended to install the i18n Ally plugin. It can help you manage internationalization copy more conveniently. After installing this plugin, you can see the corresponding language content in your code in real-time:

Configure Default Language
You just need to override the default preferences. In the corresponding application, find the src/preferences.ts file and modify the value of locale:
export const overridesPreferences = defineOverridesPreferences({
  app: {
    locale: 'en-US',
  },
});
Dynamic Language Switching
Switching languages consists of two parts:
- Updating preferences
- Loading the corresponding language pack
import type { SupportedLanguagesType } from '@vben/locales';
import { loadLocaleMessages } from '@vben/locales';
import { updatePreferences } from '@vben/preferences';

async function updateLocale(value: string) {
  // 1. Update preferences
  const locale = value as SupportedLanguagesType;
  updatePreferences({
    app: {
      locale,
    },
  });
  // 2. Load the corresponding language pack
  await loadLocaleMessages(locale);
}

updateLocale('en-US');
Adding Translation Texts
Attention
- Do not place business translation texts inside
@vben/localesto better manage business and general translation texts. - When adding new translation texts and multiple language packs are available, ensure to add the corresponding texts in all language packs.
To add new translation texts, simply find src/locales/langs/ in the corresponding application and add the texts accordingly, for example:
src/locales/langs/zh-CN/*.json
```json
{
  "about": {
    "desc": "Vben Admin 是一个现代的管理模版。"
  }
}
src/locales/langs/en-US.ts
```json
{
  "about": {
    "desc": "Vben Admin is a modern management template."
  }
}
Using Translation Texts
With @vben/locales, you can easily use translation texts:
In Code
<script setup lang="ts">
import { computed } from 'vue';
import { $t } from '@vben/locales';

const items = computed(() => [{ title: $t('about.desc') }]);
</script>
<template>
  <div>{{ $t('about.desc') }}</div>
  <template v-for="item in items.value">
    <div>{{ item.title }}</div>
  </template>
</template>
Adding a New Language Pack
If you need to add a new language pack, follow these steps:
Add the corresponding language pack file in the
packages/locales/langsdirectory, for example,zh-TW.json, and translate the respective texts.In the corresponding application, locate the
src/locales/langsfile and add the new language packzh-TW.json.Add the corresponding language in
packages/constants/src/core.ts:tsexport interface LanguageOption { label: string; value: 'en-US' | 'zh-CN'; value: 'en-US' | 'zh-CN' | 'zh-TW'; } export const SUPPORT_LANGUAGES: LanguageOption[] = [ { label: '简体中文', value: 'zh-CN', }, { label: 'English', value: 'en-US', }, { label: '繁体中文', value: 'zh-TW', }, ];In
packages/locales/typing.ts, add a new TypeScript type:tsexport type SupportedLanguagesType = 'en-US' | 'zh-CN'; export type SupportedLanguagesType = 'en-US' | 'zh-CN' | 'zh-TW';
At this point, you can use the newly added language pack in the project.
Interface Language Switching Function
If you want to disable the language switching display button on the interface, in the corresponding application, find the src/preferences.ts file and modify the value of locale accordingly:
export const overridesPreferences = defineOverridesPreferences({
  widget: {
    languageToggle: false,
  },
});
Remote Loading of Language Packs
Tip
When making interface requests through the project's built-in request tool, the default request header will include Accept-Language, allowing the server to dynamically internationalize data based on the request header.
Each application has an independent language pack that can override the general language configuration. You can remotely load the corresponding language pack by finding the src/locales/index.ts file in the corresponding application and modifying the loadMessages method accordingly:
async function loadMessages(lang: SupportedLanguagesType) {
  const [appLocaleMessages] = await Promise.all([
    // Modify here to load data via a remote interface
    localesMap[lang](),
    loadThirdPartyMessage(lang),
  ]);
  return appLocaleMessages.default;
}
Third-Party Language Packs
Different applications may use third-party component libraries or plugins with varying internationalization methods, so they need to be handled differently. If you need to introduce a third-party language pack, you can find the src/locales/index.ts file in the corresponding application and modify the loadThirdPartyMessage method accordingly:
/**
 * Load the dayjs language pack
 * @param lang
 */
async function loadDayjsLocale(lang: SupportedLanguagesType) {
  let locale;
  switch (lang) {
    case 'zh-CN': {
      locale = await import('dayjs/locale/zh-cn');
      break;
    }
    case 'en-US': {
      locale = await import('dayjs/locale/en');
      break;
    }
    // Default to using English
    default: {
      locale = await import('dayjs/locale/en');
    }
  }
  if (locale) {
    dayjs.locale(locale);
  } else {
    console.error(`Failed to load dayjs locale for ${lang}`);
  }
}
Removing Internationalization
Firstly, it is not recommended to remove internationalization, as it is a good development practice. However, if you really need to remove it, you can directly use Chinese copy and then retain the project's built-in language pack, which will not affect the overall development experience. The steps to remove internationalization are as follows:
Hide the language switching button on the interface, see: Interface Language Switching Function
Modify the default language, see: Configure Default Language
Disable
vue-i18nwarning prompts, in thesrc/locales/index.tsfile, modifymissingWarntofalse:tsasync function setupI18n(app: App, options: LocaleSetupOptions = {}) { await coreSetup(app, { defaultLocale: preferences.app.locale, loadMessages, missingWarn: !import.meta.env.PROD, missingWarn: false, ...options, }); }

 vben
vben Li Kui